
How to schedule TikTok posts for social media creators in 2026
How to schedule tiktok posts in 2026 means choosing either auto publish (your scheduler posts for you) or notification scheduling (your phone reminds you to finish the post in TikTok), then following a repeatable workflow: export a 9:16 video, write a keyword-first caption, choose a publish time, and verify the post after it goes live. Auto publish saves the most time, while notifications are safer when audio, privacy, or account settings are picky.
If TikTok is your main growth channel, you already know the real problem is not filming.
It’s the uploading cycle: cropping three versions, rewriting captions, hunting hashtags, and realizing you forgot to post until it’s too late.
If you want a lightweight calendar that keeps you consistent without a clunky dashboard, start by scheduling your first TikTok inside PostPlanify and locking in one week of posts.
Quick answer and when to use auto publish vs notifications
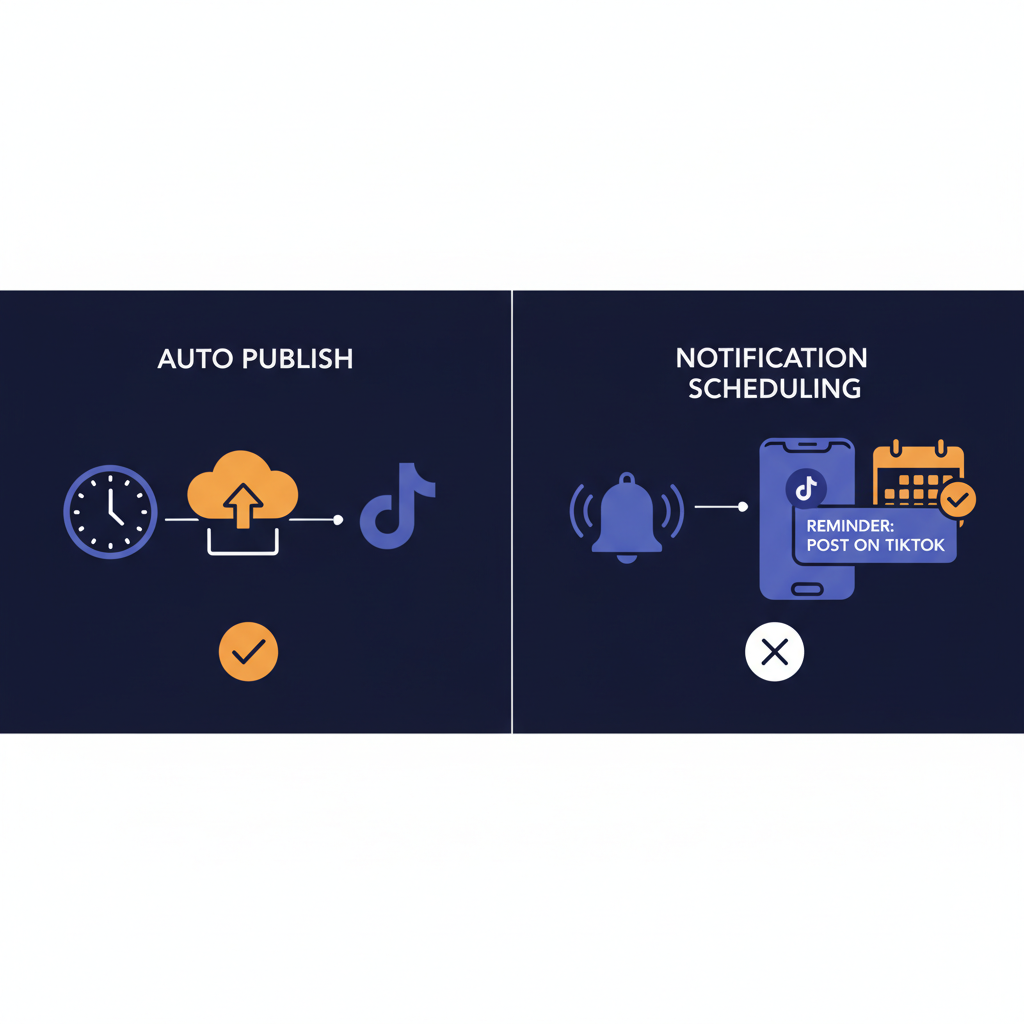
Auto publish and notification scheduling both let you schedule TikTok posts. The difference is who taps “Post.” With auto publish, the scheduler publishes your TikTok video at the scheduled time. With notifications, your scheduler sends a reminder, then you open TikTok and finish the post manually.
In 2026, creators pick auto publish when they want true hands-off posting. They pick notifications when they want maximum control over audio, last-minute edits, or TikTok prompts that do not always carry over through integrations.
Auto publish vs notifications in one glance
You can treat this like a decision tree.
If you need zero-touch publishing, pick auto publish. If you are okay tapping through TikTok once per post, notifications can still work.
| Scenario | Best choice | Why it wins |
|---|---|---|
| You post daily or more | Auto publish | Removes the “forgot to post” problem |
| You manage multiple client accounts | Auto publish | Fewer moving parts, fewer mistakes |
| You depend on very specific audio behavior | Notifications | TikTok-native selection and checks |
| You often change captions minutes before posting | Notifications | Easy last-second edit inside TikTok |
| Your team needs approvals before publish | Auto publish | Schedule after approval, then hands-off |
What “auto publish” actually requires in 2026
Most tools that offer auto publish rely on TikTok’s official posting capabilities through approved integrations. TikTok’s developer docs describe direct posting via the Content Posting API and note restrictions for unaudited clients, including private-only posting in some cases and usage caps. That is why many schedulers either (a) support true auto publish for eligible accounts or (b) fall back to notifications for everyone else.
Practically, here’s what you should assume:
- You must connect your TikTok account inside the scheduler.
- TikTok permission scopes matter. If permissions are missing, you get notifications instead of auto publish.
- Some post settings may require TikTok confirmation.
If your scheduler says “Notification only,” it is not necessarily broken. It might be following TikTok’s allowed flow for your account.
When notifications are the smarter move
Notifications still solve consistency. They just do not remove the final step.
Use notification scheduling when:
- You want to double-check the cover frame, on-screen text, and music right before posting.
- You are posting a sensitive topic where you want one last review.
- Your workflow includes replying to comments right after posting, and you want to be in the app anyway.
TikTok limits creators hit while scheduling
Scheduling fails most often because creators try to schedule content that violates a platform limit.
Two limits matter most:
- Video length: TikTok has expanded limits over time, including tests up to 60-minute uploads. Many creator accounts still perform best on shorter clips, but from a scheduling standpoint, your upload needs to meet the allowed duration for your account and method.
- Caption length: Many schedulers and platform documentation still reference a 2,200 character limit for TikTok captions. Some recent guides claim 4,000 characters for certain users and rollouts. If you schedule through a tool, treat 2,200 characters as your safe ceiling unless your posting flow confirms more.
The rule: write the caption so it works even if it gets truncated. Put the hook and keywords in the first 120 characters.
Read more: Want a repeatable weekly plan? Build a simple Monday-to-Sunday calendar and batch your edits in one sitting.
Step-by-step: prepare, crop, caption, and schedule TikTok videos
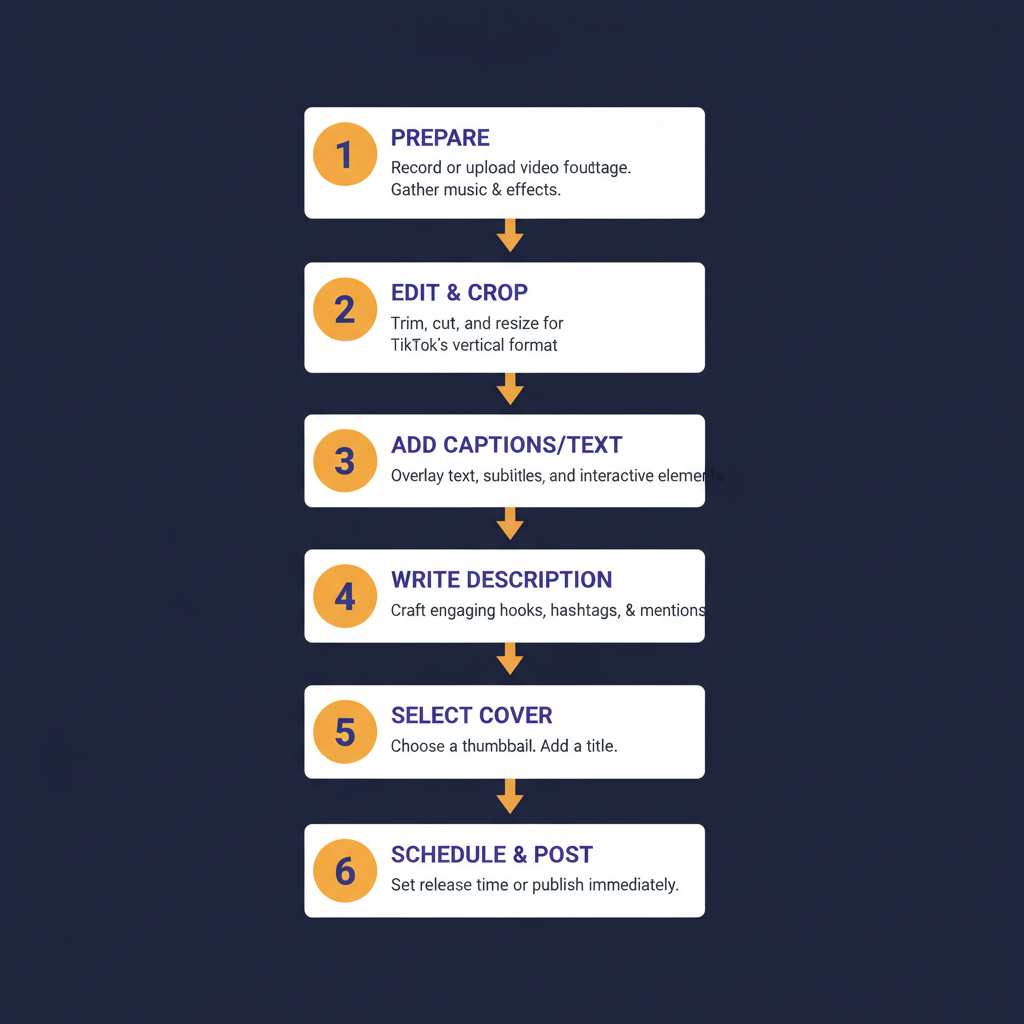
This section is the exact workflow you can run every week. It is built for speed, not perfection.
The goal is simple: you should be able to schedule TikTok posts in under 6 minutes per video once your system is set.
1) Prepare your TikTok video file the scheduler will accept
Before you open any scheduling tool, get the file right. Most scheduling failures are file problems, not tool problems.
Aim for TikTok-native specs:
- 9:16 vertical video
- 1080 × 1920 resolution
- MP4 or MOV
- Clean audio track
If your video looks crisp in TikTok but blurry after scheduling, it is usually a bitrate or export setting issue from your editor.
Quick export checklist (fast and safe)
Export with these settings when you can:
- Resolution: 1080×1920
- Frame rate: 30 fps
- Codec: H.264
- Audio: AAC
Keep your safe zone clean. Leave space near the top and bottom for UI overlays.
2) Crop and format for TikTok first, then reuse everywhere
Creators waste hours by making “Instagram first” edits. TikTok is the strictest on vertical feel. So build TikTok-first.
If you shoot in 4K, do not rely on auto-cropping. Crop intentionally so:
- Your face stays centered.
- Captions are not covered by buttons.
- The first frame is readable as a thumbnail.
If you use Canva, create a single 1080×1920 template with:
- Brand colors
- A fixed subtitle area
- A fixed hook header area
Then duplicate it for each post.
3) Write a caption that works for both TikTok SEO and humans
Scheduling TikTok posts is not only about timing. TikTok search drives steady views for creators who write useful captions.
Write your caption like this:
- Hook (1 line): say what the video solves.
- Keyword line (1 line): include the phrase people search.
- Proof (1 line): a number, result, or quick detail.
- CTA (1 line): ask for a comment, follow, or save.
Keep sentences short. Make the first two lines strong because people see those first.
AI caption example you can copy
Here is a creator-safe template you can paste into your caption generator and adapt:
- Topic: scheduling TikTok posts
- Audience: solo creators + small teams
- Outcome: post daily without missing times
Example caption:
“Posting daily is easy. Publishing daily is the hard part.
Here’s how I schedule TikTok posts for a full week in 25 minutes.
Step 1: Export 9:16 at 1080×1920.
Step 2: Write a 2-line hook + 3 keywords.
Step 3: Schedule at your best hour and stop thinking about it.
Want my weekly calendar template? Comment ‘CALENDAR’.”
If you are scheduling cross-platform too, keep a short TikTok version and a longer version for YouTube Shorts descriptions.
4) Choose a posting time based on your data, not advice
Generic “best time to post” lists waste your time.
Instead, pick a time window using your last 14 days of analytics:
- Find your top 10 posts.
- Note the first hour performance.
- Look for a repeatable time window.
If you do not have enough data, start with two time slots only, then test for 2 weeks.
A simple approach:
- Slot A: lunchtime
- Slot B: early evening
Alternate and compare.
5) Schedule inside PostPlanify with a simple weekly system
If your goal is to schedule TikTok posts without tab chaos, PostPlanify is built for that “one calendar” workflow.
Here’s the clean weekly system:
- Connect TikTok (and any other platforms you publish to).
- Create a “Weekly Batch” in your calendar.
- Upload 7 videos.
- Add captions and hashtags.
- Set publish times.
- Preview the post formatting.
Because PostPlanify supports multiple platforms from one dashboard, you can also repurpose the same asset to Instagram, YouTube, and Threads right after you finish the TikTok version. That saves real time when you run client accounts.
You can start here: PostPlanify.
6) Canva import path for faster uploads
If you design covers, text frames, or end cards in Canva, the fastest flow is:
- Build the video in Canva.
- Export at 1080×1920.
- Import into your scheduler.
PostPlanify highlights Canva integration on its homepage, and creators mention it as a time saver because you can access Canva designs without extra downloading steps. Use that to keep your file workflow simple.
7) Add a cover strategy that boosts clicks
Many creators ignore covers on TikTok because videos autoplay. But covers still matter:
- They drive profile grid clicks.
- They impact saves when someone returns later.
Keep cover text under 6 words. Use high contrast. Use one clear promise.
Examples:
- “Schedule 7 TikToks in 25 min”
- “Auto publish vs notifications”
- “3 reasons your scheduler fails”
8) Final pre-schedule QA checklist (2 minutes)
Do this before you hit schedule.
- Watch the first 2 seconds. Is the hook instant?
- Check subtitle placement. Not blocked by UI.
- Confirm the caption fits the safe character limit.
- Confirm the thumbnail frame is not blurry.
- Confirm the scheduled time is correct for the account timezone.
If you manage multiple client accounts, add one more step: confirm you are on the right profile.
Read More
- Planning a month of content: build four weekly themes, then batch scripts.
- Cross-posting without burnout: create one “master caption” and trim per platform.
Read more: If your workflow includes approvals, add a “Ready” stage and only schedule after sign-off.
Common pitfalls and troubleshooting
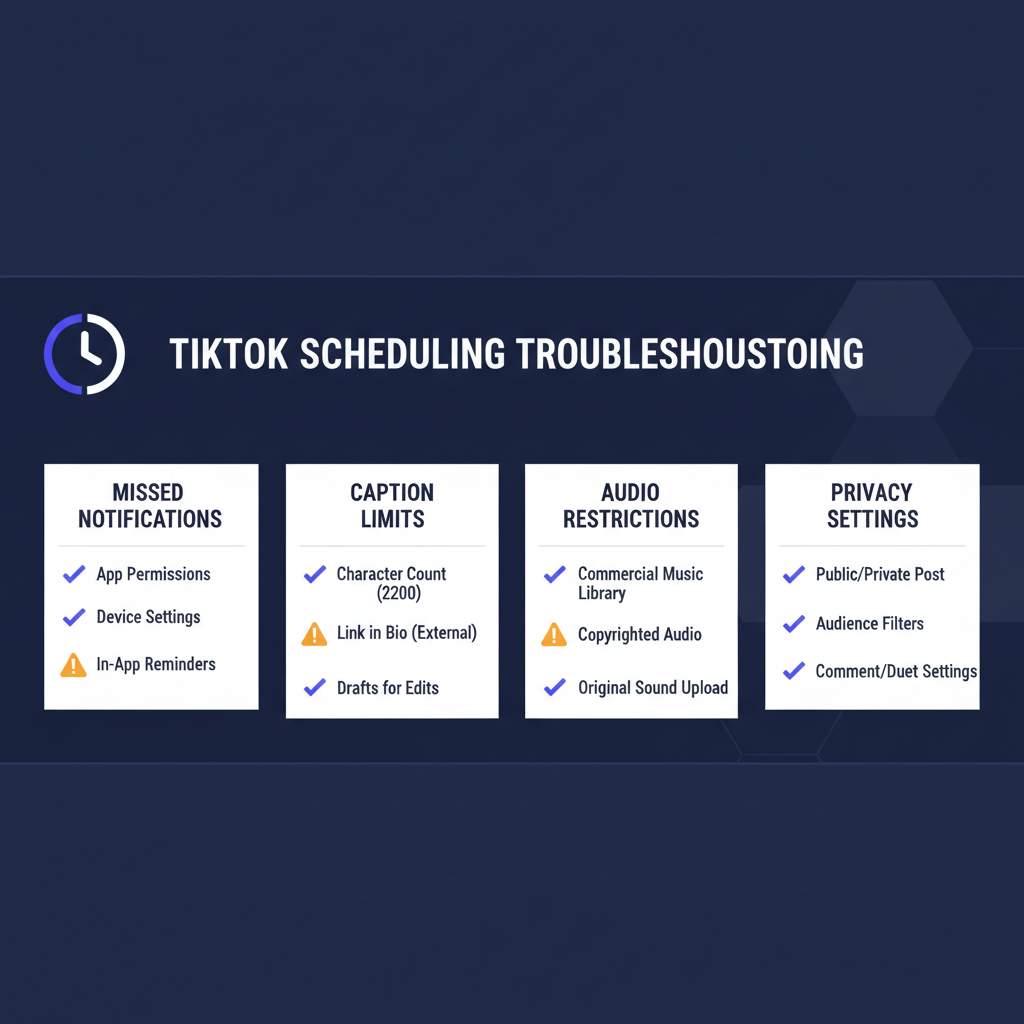
Scheduling TikTok posts is easy when it works. When it fails, it usually fails in repeatable ways.
This troubleshooting section is designed to help you fix issues in minutes instead of spiraling into settings screens.
Pitfall 1: Missed notifications and posts that never go live
This happens only with notification scheduling.
Common causes:
- Notifications disabled at the OS level.
- Battery saver blocking your scheduler.
- The scheduler is logged out.
- The phone timezone changed.
Fix in 3 checks:
- Turn on notifications for the scheduler app.
- Disable battery optimization for that app.
- Send yourself a test notification for the next 5 minutes.
If you cannot trust notifications, switch to auto publish for your highest priority posts.
Pitfall 2: Captions get cut off or fail to publish
Caption limits are messy in practice because:
- Many publishing tools cap TikTok at 2,200 characters.
- Some newer guides claim TikTok supports up to 4,000 characters for captions.
If you schedule TikTok posts through a tool, the tool’s limit often wins.
Fix:
- Keep scheduled captions under 2,200 characters unless you confirm your flow supports more.
- Put keywords and hook in the first 120 characters.
- Move extra detail to a pinned comment.
Pitfall 3: Audio restrictions or missing sounds
Audio is the #1 reason creators prefer notifications.
Common causes:
- You used licensed sounds that cannot be applied through your publishing flow.
- Your video includes copyrighted music that triggers restrictions.
Fix:
- Export with clean audio first.
- Add platform-native audio during the final TikTok step (notification flow).
- If you need hands-off posting, keep your audio original or cleared.
Pitfall 4: Video uploads but quality looks worse
This is usually export settings.
Fix:
- Re-export at 1080×1920.
- Use H.264 and a higher bitrate.
- Avoid uploading a file that was downloaded from another platform.
Pitfall 5: The post publishes private or with wrong privacy
If you use an API-based posting method, TikTok’s developer rules can restrict visibility for unaudited clients or require privacy options to match what TikTok returns for that creator.
Fix:
- Check privacy settings before scheduling.
- If a post goes live as private, open TikTok and change privacy manually.
- For teams, document each client’s required privacy defaults.
Pitfall 6: Scheduling across platforms breaks your caption
When you schedule TikTok posts and also cross-post to X or Threads, the shortest character limit can force truncation in some tools.
Fix:
- Write a TikTok caption and a short-caption variant.
- Use the short variant for cross-posts.
- Keep the main TikTok caption intact.
Read More
- Caption workflows: keep a swipe file of 30 hooks for your niche.
- Posting consistency: use streak tracking or a simple “publish scorecard.”
Read more: If you run an agency, standardize a “TikTok export preset” for every editor.
Compact comparison block: Why choose PostPlanify
You can schedule TikTok posts with many tools. The real difference is how fast you can move from “video ready” to “week scheduled,” without paying $100+ per month for features you do not touch.
PostPlanify positions itself as a simpler scheduler built for creators and small teams: one calendar, multiple platforms, with creator-first features like previews, Canva integration, bulk scheduling, analytics, and team collaboration depending on your plan.
Why PostPlanify stands out
PostPlanify is built for speed and consistency. It keeps your workflow in one calendar so you can schedule TikTok posts and cross-post to other platforms without rewriting everything.
What creators usually like most is that it stays simple while still handling high-volume publishing.
- One calendar for 9 platforms so you can see your entire week at a glance.
- Canva & Google Drive integration so your assets are easier to pull in.
- AI writing assistant for captions when you are batching content fast.
- Platform-specific previews so you spot formatting issues before they go live.
- Bulk scheduling for agencies and teams publishing at scale.
- Team collaboration and analytics on higher tiers when you need them.
PostPlanify also offers a 7-day free trial with no credit card required, which is ideal if you want to test scheduling TikTok posts on a real content week before you commit.
Start the trial here: PostPlanify.
PostPlanify vs clunky schedulers checklist
If you are deciding fast, use this checklist.
| Need | Clunky tools | PostPlanify |
|---|---|---|
| Quick weekly planning | Often slow | Built around one calendar |
| Simple creator workflow | Too many menus | Clean UI focused on posting |
| Canva import | Sometimes | Highlighted feature |
| Bulk scheduling | Often locked behind enterprise | Available on Premium |
| Pricing that fits small teams | $100+/mo common | $29–$69/mo plans shown |
Clear next step
If your goal is to schedule TikTok posts consistently in 2026 without missing a day, run a 7-day test:
- Batch 7 videos.
- Schedule them all.
- Track what posted on time and what performed best.
You can do that with the PostPlanify free trial, then keep the workflow if it saves you hours.
Key takeaways
- Auto publish is the best option when you want true hands-off posting.
- Notification scheduling is better when you need TikTok-native control over audio and last-minute edits.
- Keep scheduled captions under 2,200 characters unless your posting flow confirms higher limits.
- Export TikTok-first at 1080×1920 and reuse the same asset across platforms.
- A lightweight calendar workflow, like PostPlanify, is often faster than feature-heavy tools.
FAQs
Can you schedule TikTok posts directly in TikTok in 2026?
Yes, some accounts can schedule in TikTok. Many creators still prefer a scheduler to manage multiple platforms and a single content calendar.
Is auto publish better than notification scheduling?
Auto publish saves the most time. Notifications are safer when you need TikTok-native audio selection or last-second checks.
What caption length should I use when I schedule TikTok posts?
Keep the hook and keywords in the first 120 characters. Stay under 2,200 characters for maximum compatibility with schedulers.
Why did my scheduled TikTok post go live as private?
Some posting integrations can restrict visibility based on account settings or API rules. Check privacy settings and update in TikTok if needed.
What is the best social media scheduler for creators who post a lot?
Pick a tool with a fast calendar, previews, and bulk scheduling. PostPlanify is a strong fit for creators and small teams.
Leave a Reply